Table of Contents
Accessing S3 objects via S3 Pre-signed URLs generated using Python Flask Server deployed on Amazon Ec2 instance.
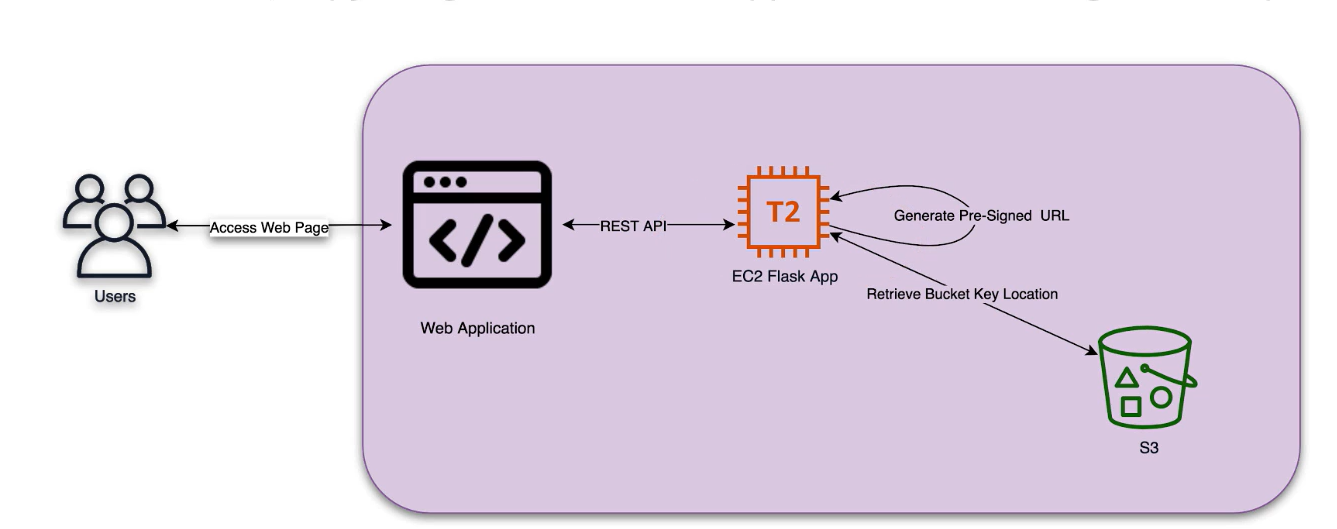
High-level Architecture
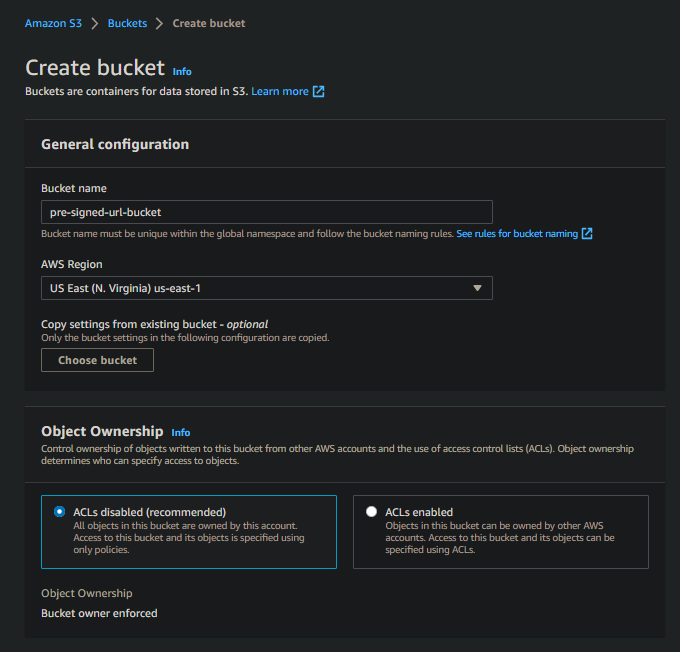
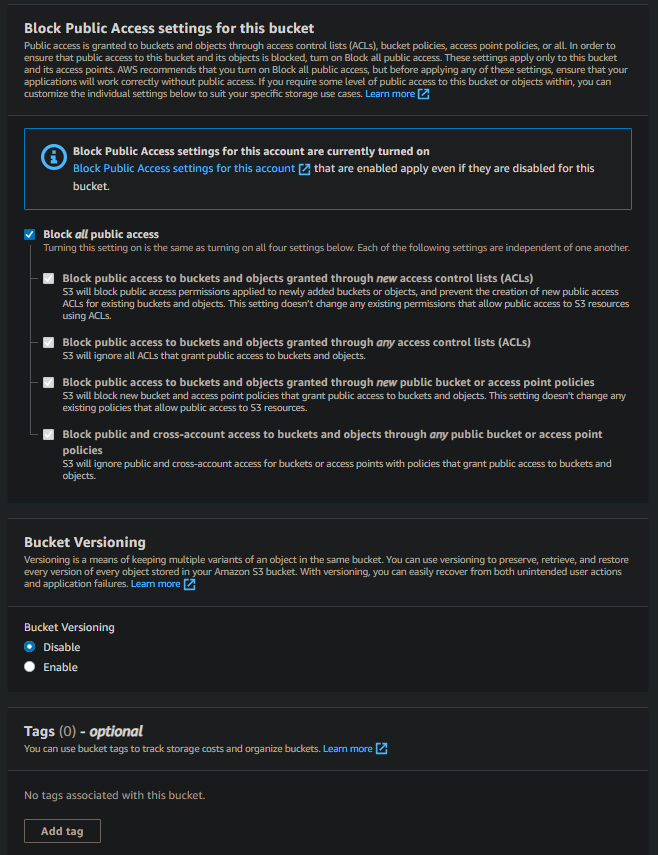
Step 0. Create an S3 bucket, copy the Image file and the code
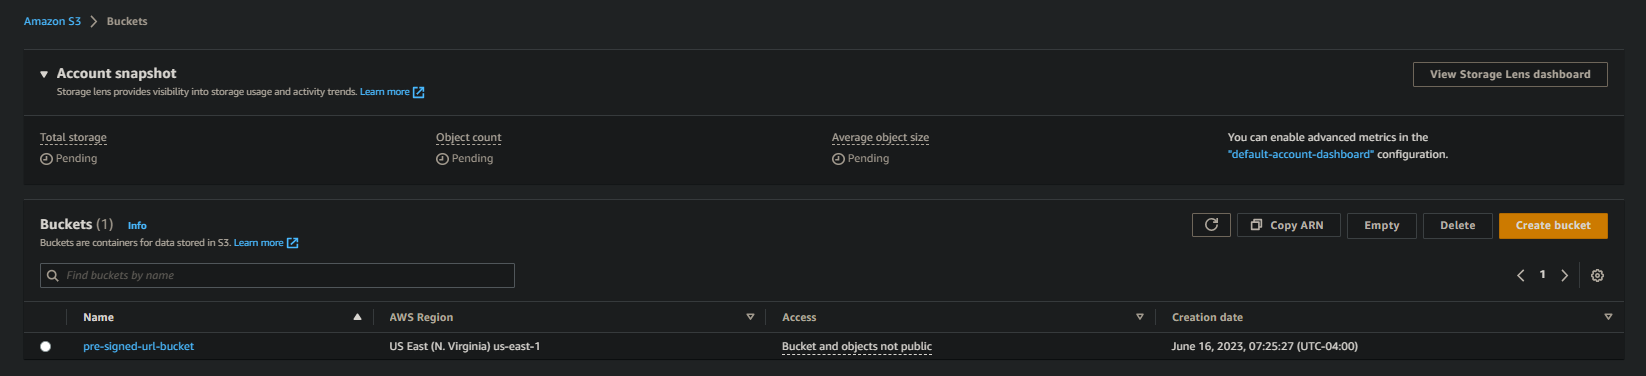
a. Create an S3 bucket named pre-signed-url-bucket

b. Create a file pre_signed_url.py on your local with the following content
|
1 2 3 4 5 6 7 8 9 10 11 12 13 14 15 16 17 18 19 20 21 22 23 24 25 26 27 28 29 30 31 32 33 34 35 36 37 38 39 40 41 |
import os import boto3 from flask import Flask, session, redirect, escape, request # Create the pre-signed URL def pre_signed_s3_url(bucket, key, expiration): """ Generate pre-signed URL on S3 (Default 1 hour expiration) """ params = { 'Bucket': bucket, 'Key': key } s3 = boto3.client('s3') url = s3.generate_presigned_url('get_object', Params=params, ExpiresIn=expiration) return (url) # Configure the application name with the FLASK_APP environment variable. app = Flask(__name__) # Configure the secret_key with the SECRET_KEY environment variable. app.secret_key = os.environ.get('SECRET_KEY', default=None) @app.route('/') def index(): pre_signed_url = pre_signed_s3_url('pre-signed-url-bucket', 'sample.png', 3660) html_out = '''<!DOCTYPE html> <html> <head> <title> Pre-signed url Step-By-Step Guide </title> </head> <body> <h1>Image from pre-signed URL</h1> <img src= {0} alt="Pre-Signed URL generated image link"> </body> </html>'''.format(pre_signed_url) return html_out |
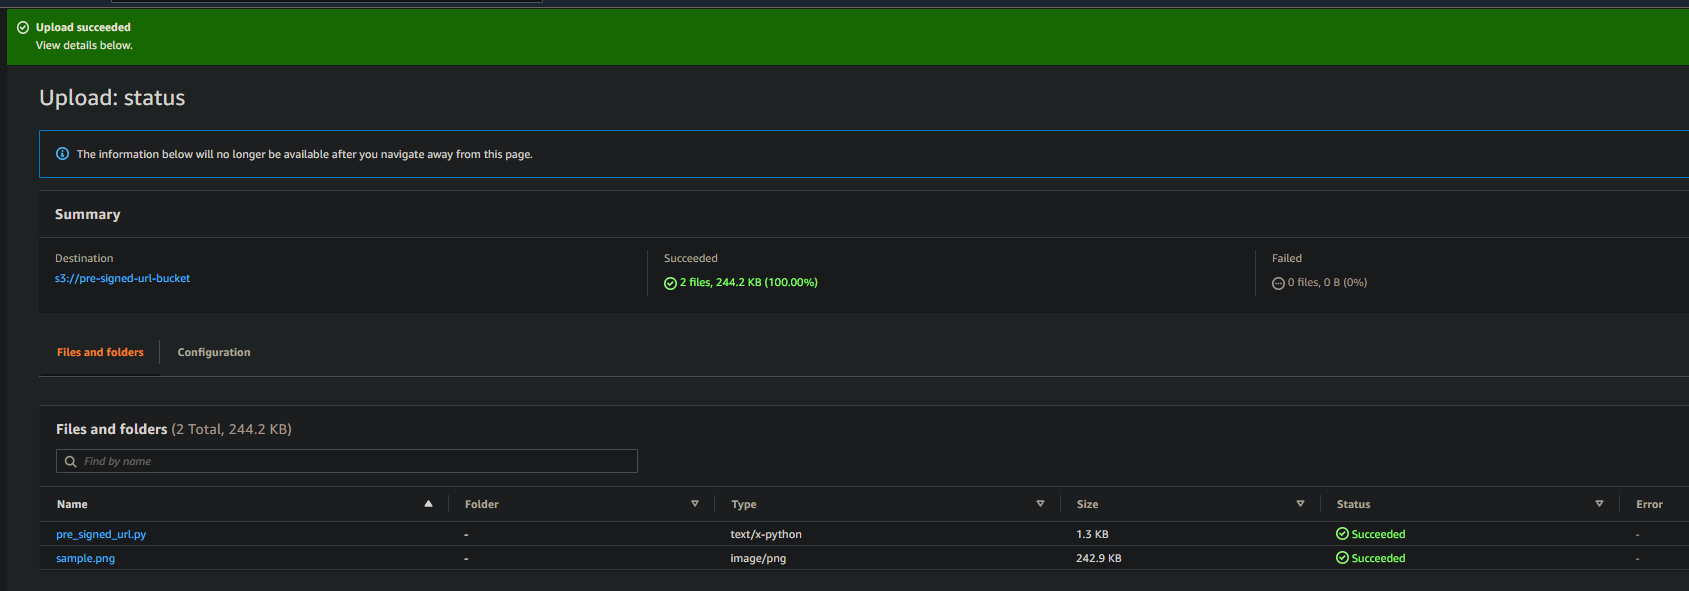
c. Copy the file pre_signed_url.py and the image sample.png to pre-signed-url-bucket


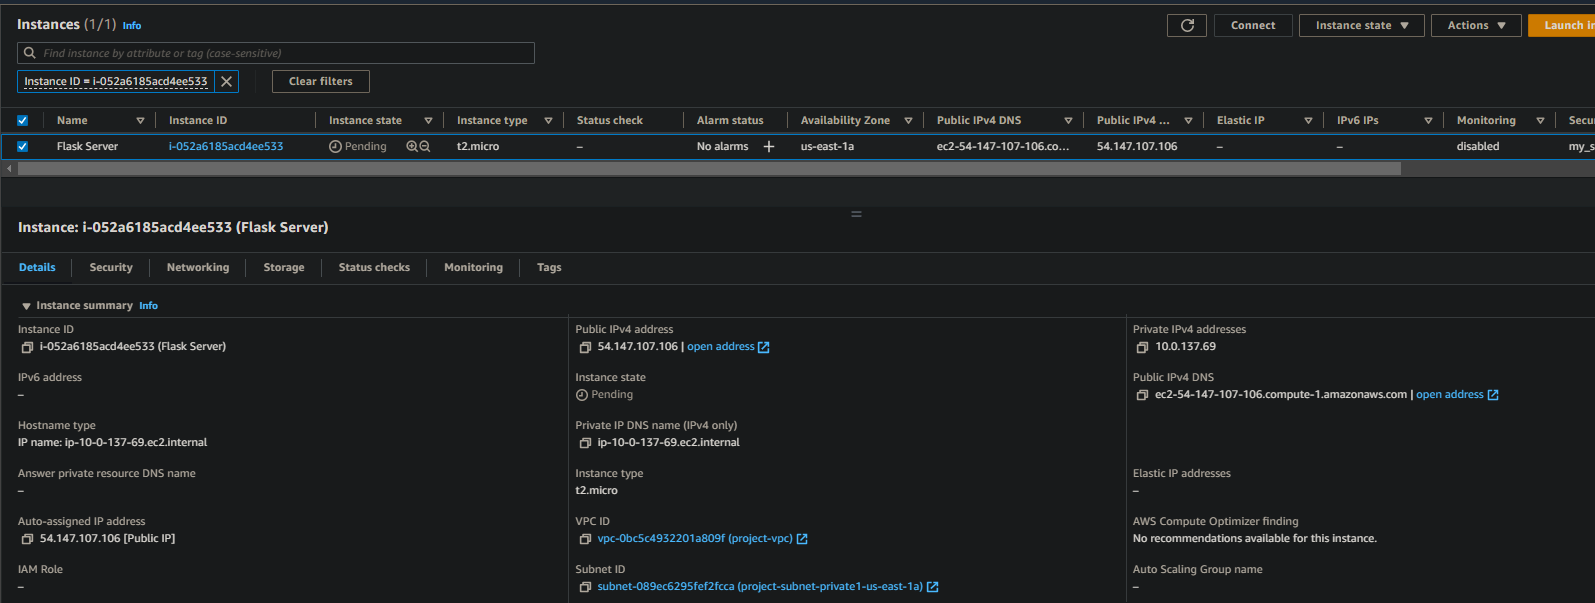
Step 1. Launch an EC2 Instance
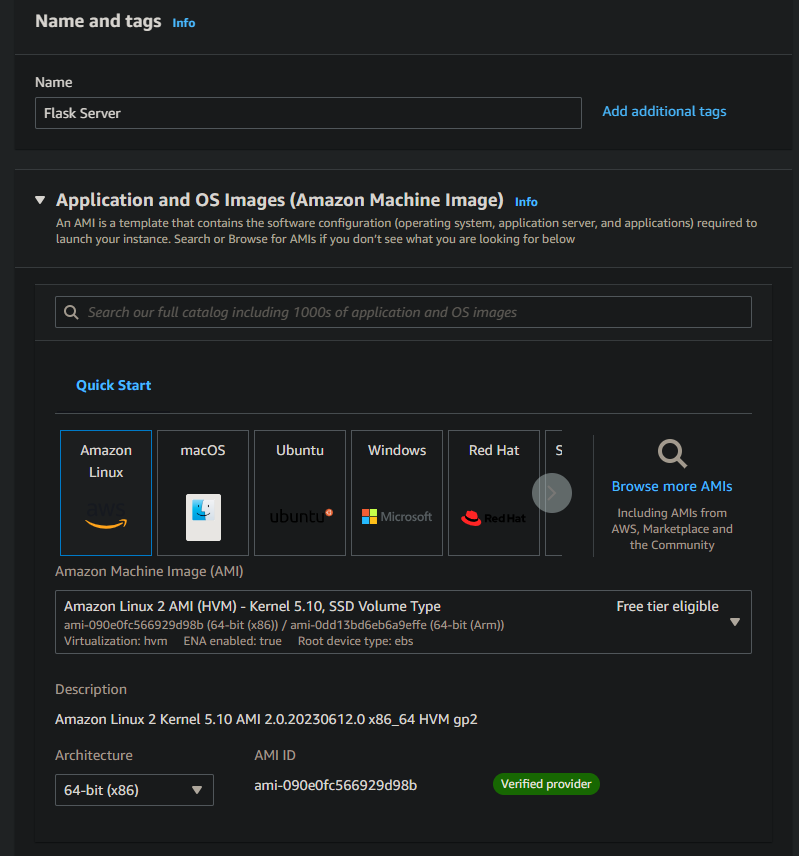
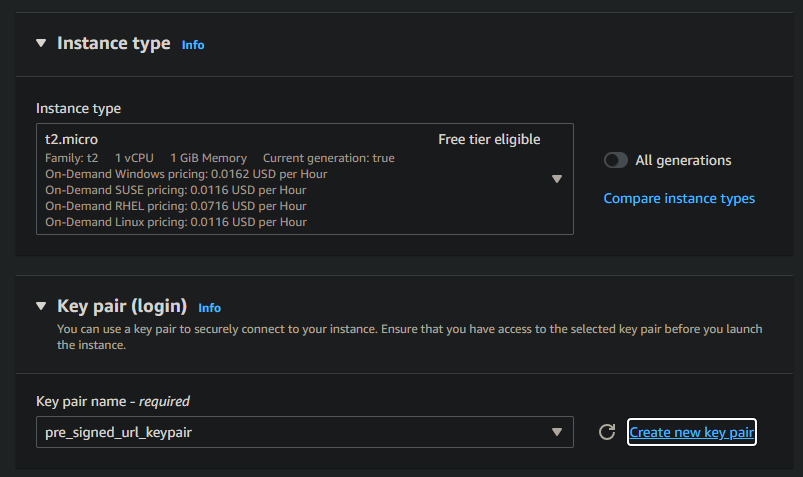
a. Launch an EC2 instance with the following config
Name: Flask Server
b. Create a Key pair with pem extension
c. Create a Security Group and a Security Group Rule to allow incoming SSH and Custom TCP (port 5000) traffic
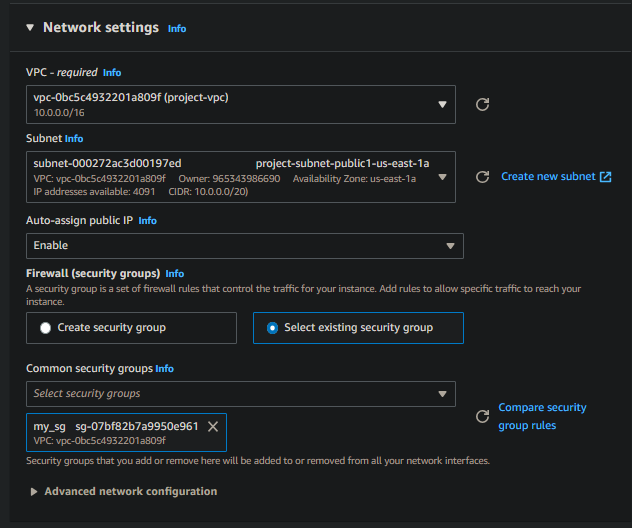
d. Launch Instance
Step 2. Connect and Install Python and Virtualenv on E2 Instance
a. Connect to the EC2 Instance
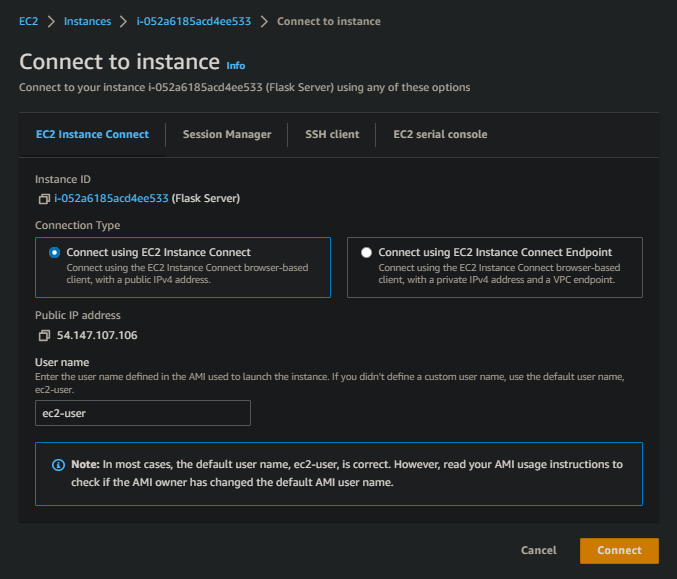
b.
c. Install Python and Virtualenv
|
1 2 3 4 |
sudo yum install python3 sudo yum install python3-pip pip install virtualenv |
Step 3. Copy the image file and the code from S3 to the EC2 instance
|
1 2 |
aws s3 cp s3://pre-signed-url-bucket/pre_signed_url.py pre_signed_url.py aws s3 cp s3://pre-signed-url-bucket/sample.png sample.png |

Note
If you get “fatal error: Unable to locate credentials” try running the following and check the output
|
1 |
aws configure list |
if the credentials are not set, set the credentials using the following command
|
1 |
aws configure |
Step 4. Run your Flask Web Application Server
|
1 2 3 4 5 6 7 8 |
virtualenv venv source ./venv/bin/activate # install boto3 library pip3 install boto3 export FLASK_APP=pre_signed_url.py export SECRET_KEY=0987654321 pip3 install flask flask run -h 0.0.0.0 -p 5000 --reload |
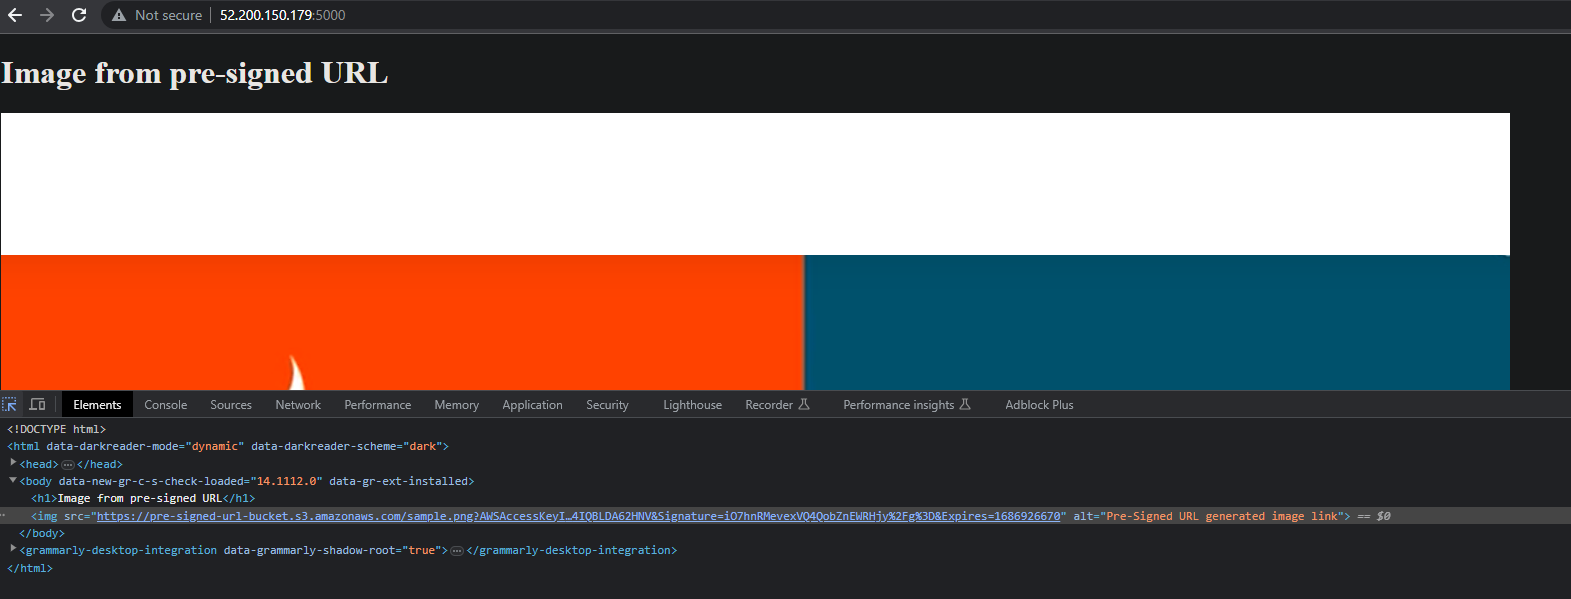
Step 5. Access the Image from the browser
http://<your_ec2_instance_public_ip>:5000
Links
https://stackoverflow.com/questions/67218285/trying-to-install-pip3-in-amazon-linux-2
https://repost.aws/knowledge-center/s3-locate-credentials-error