Table of Contents
A step-by-step guide on how to mount Elastic File System (EFS) on AWS EC2 instances.
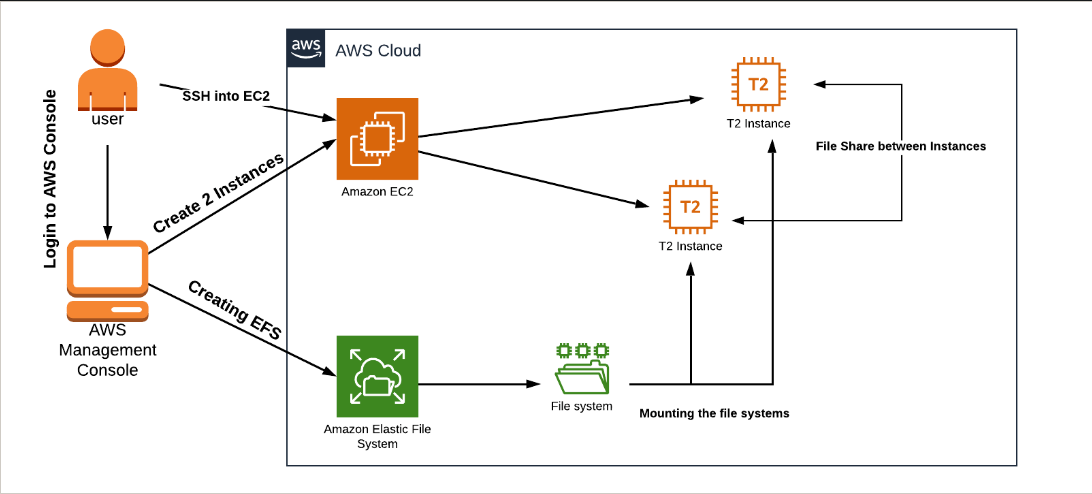
Architecture Diagram
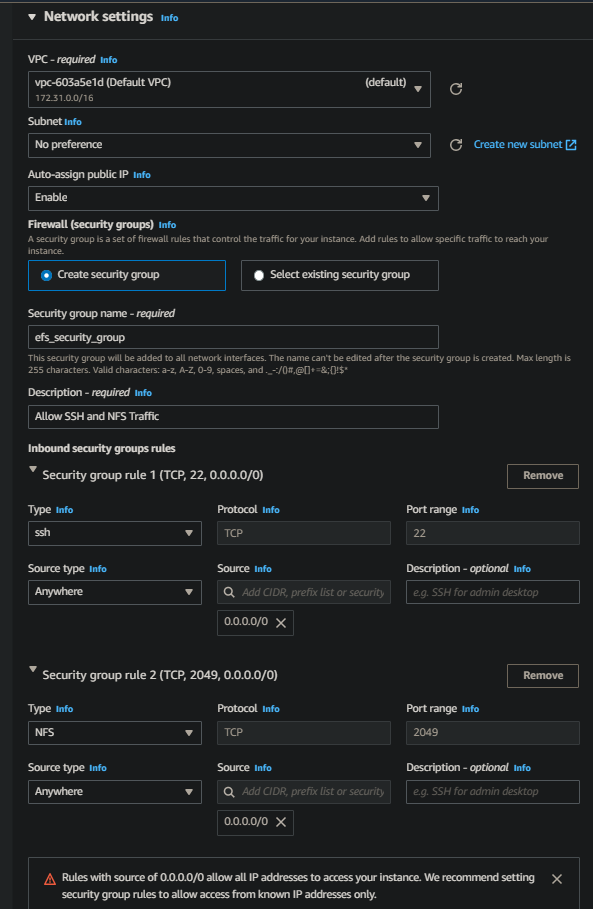
Step 1. Launch Two EC2 Instances
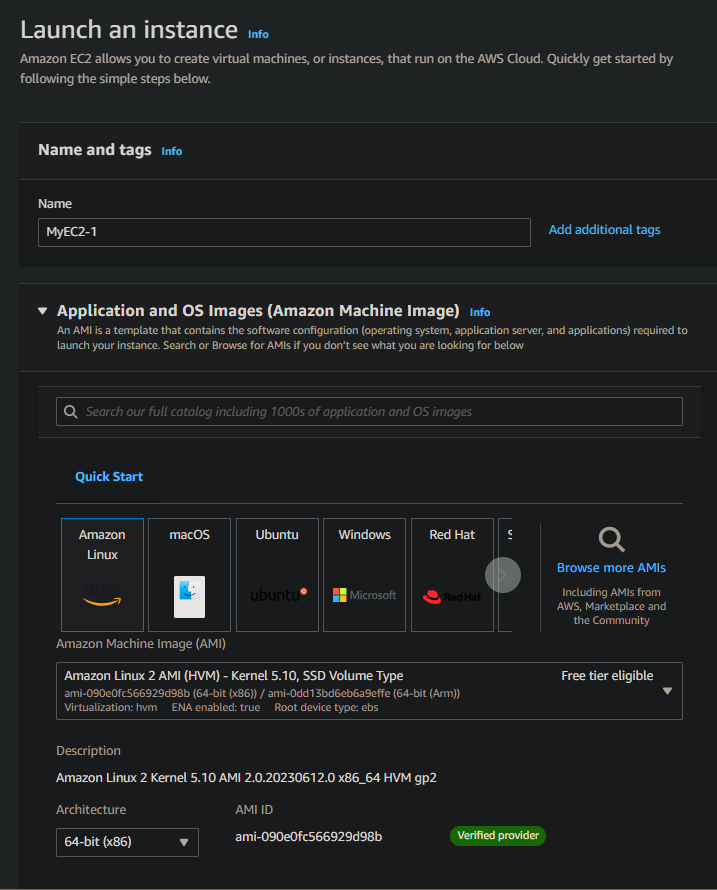
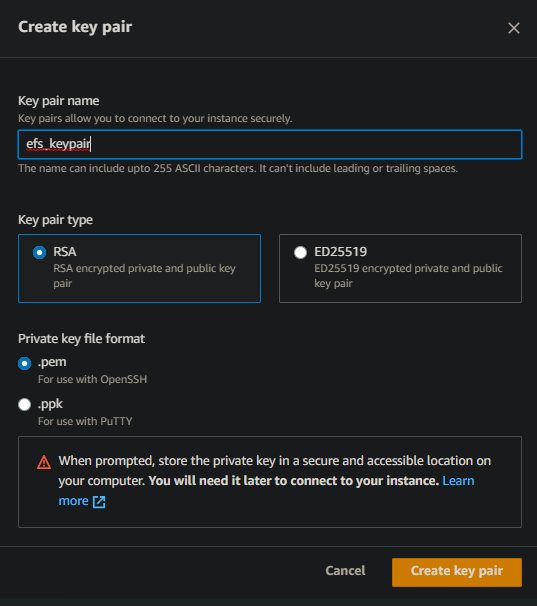
a. Launch an EC2 instance with the following configuration.
Name: MyEC2-1
b. Launch another EC2 instance with the same keypair and security group and name MyEC2-2
c. Wait until the initialization status changes to Running
Step 2. Create an Elastic File System
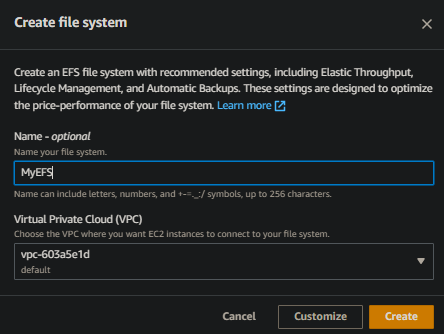
a. Goto EFS and click Create File System button. On the Pop-Up, click Customize button
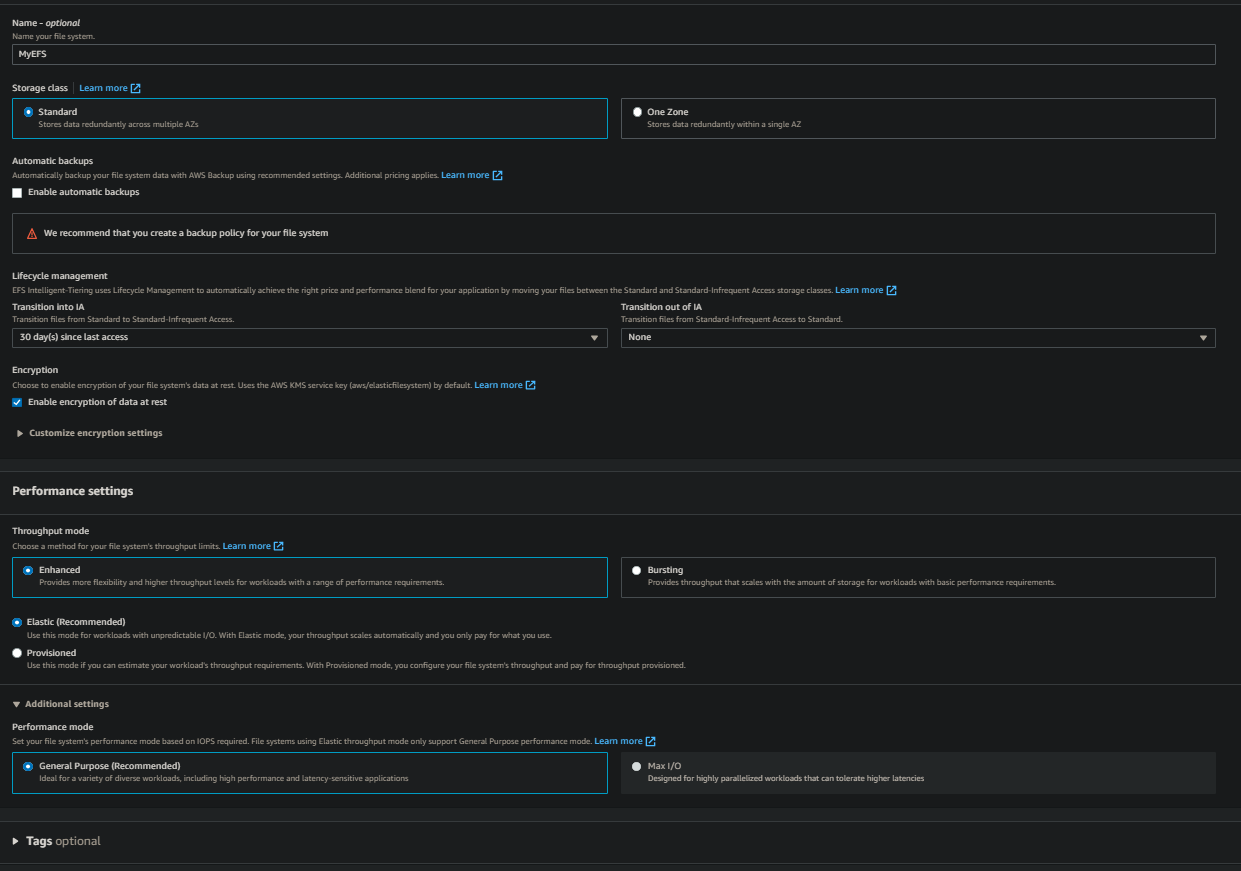
b. Uncheck the option Enable automated backups
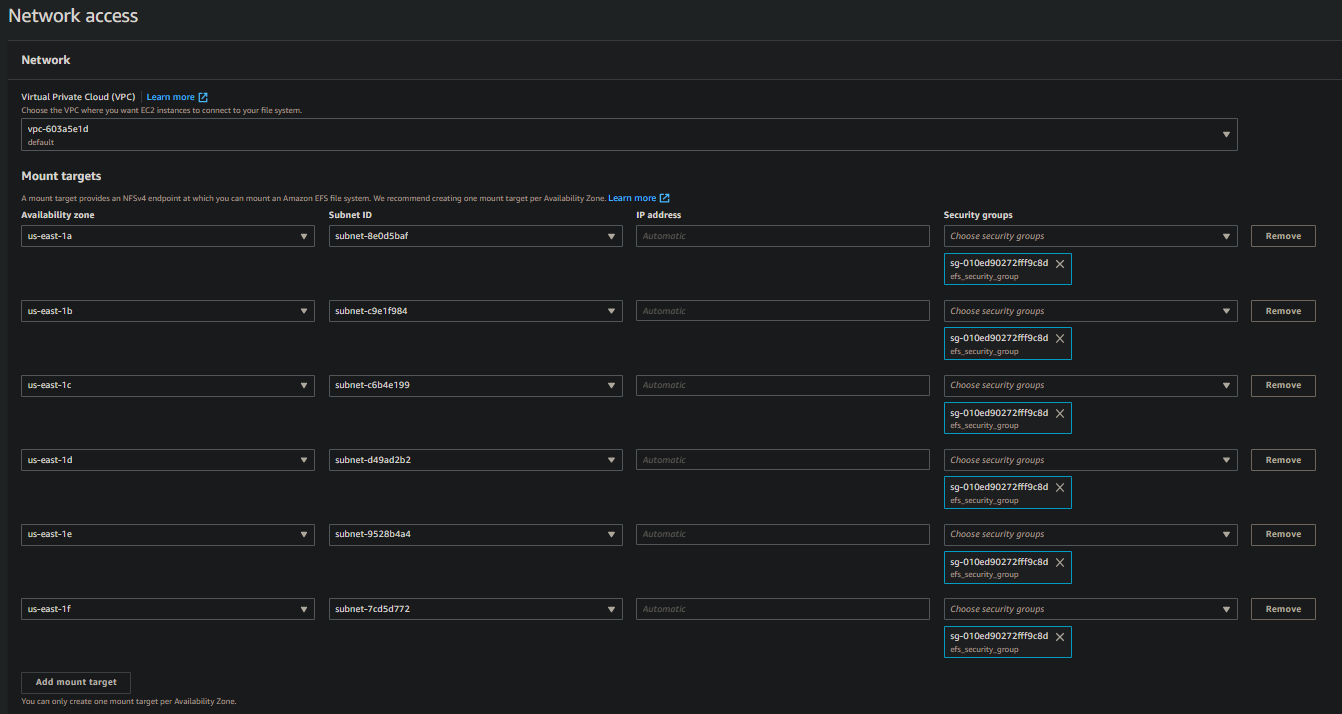
c. Network Access Section, remove the Default security group and efs_security_group and click on Next button
d. Leave File System Policy as is, click on the Next button.
e. Review the configuration and click on Create button.

Step 3. Mount the EFS File System to EC2 instances
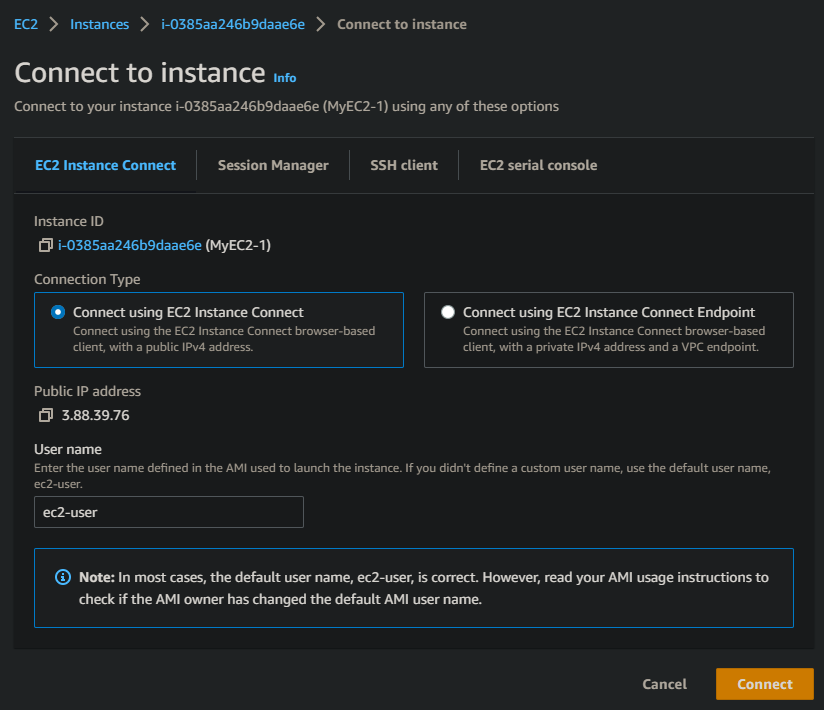
a. Navigate to EC2 dashboard
b. Select MyEC2-1 and click Connect button
c. Run the following commands to update the packages and install amazon-efs-util
|
1 2 3 4 5 |
sudo -s yum -y update yum install -y amazon-efs-utils mkdir efs mkdir aws |

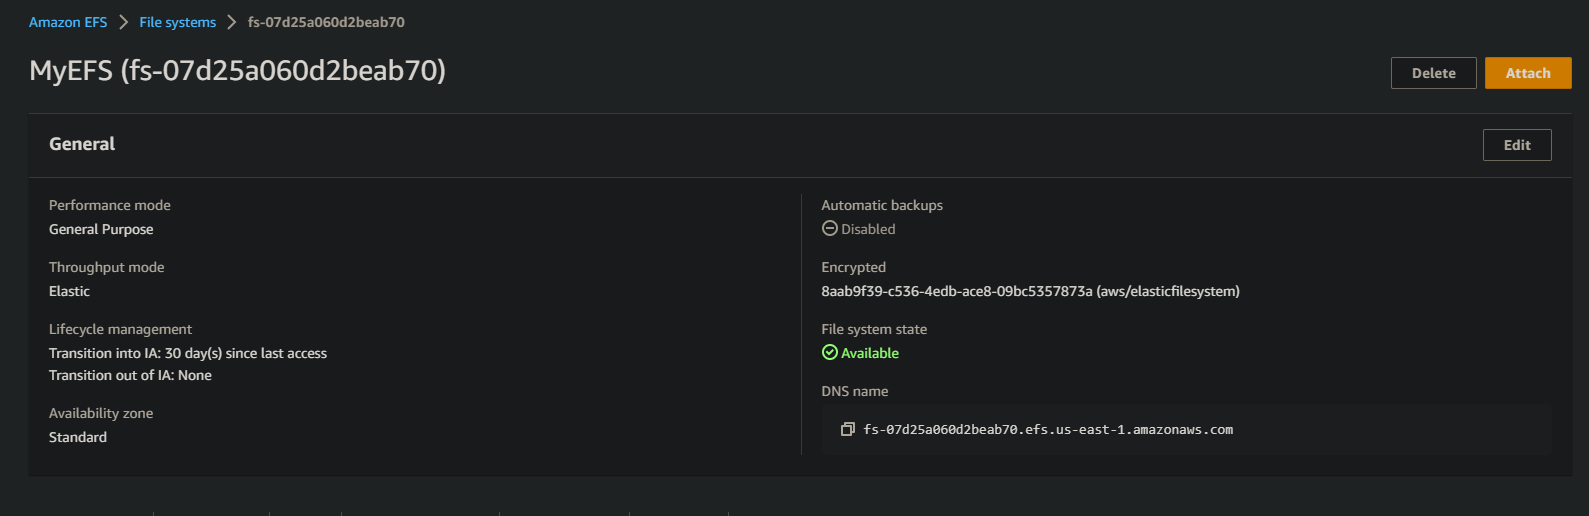
d. Navigate to EFS Dashboard and click on the file system – MyEFS
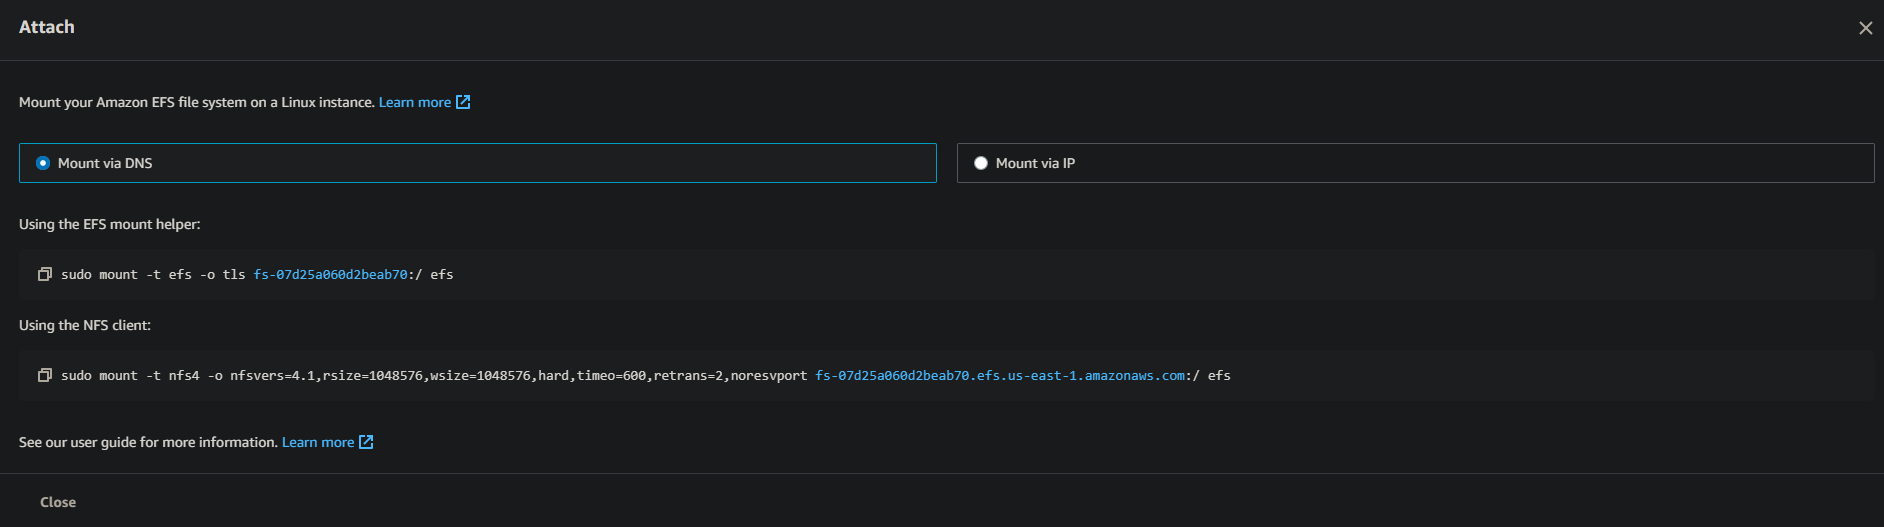
d. Click on Attach button and copy the command “Using the EFS mount helper”
|
1 |
sudo mount -t efs -o tls fs-<your_file_system_id>:/ efs |
e. Paste the above-copied command into the MyEC2-1 terminal
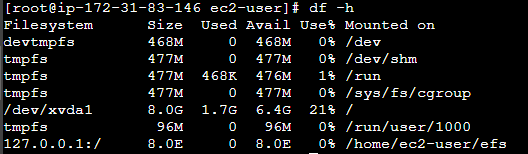
f. Use the following command to display information for all currently mounted file systems.
|
1 |
df -h |
g. Repeat step a to h to mount the file system to MyEC2-2 instance.
Step 4. Testing the file system
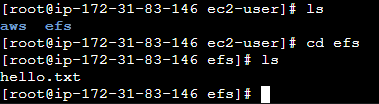
a. Create a file hello.txt under the efs directory on MyEC2-2 instance
|
1 2 3 4 |
sudo -s cd efs touch hello.txt ls -ltr |

b. Go to MyEC2-1, and navigate to the efs directory; you should be able to see the file hello.txt